Hanging a bathroom mirror is a manageable project that can significantly impact the functionality and aesthetics of your space. Whether completing a renovation or simply updating your bathroom’s look, the mirror you choose and how you install it will contribute to the room’s overall ambiance. Understanding the process and knowing the proper techniques will ensure that your mirror is both secure and perfectly positioned to suit your needs.
Installing a bathroom mirror requires careful preparation, precise measurement, and the right tools. The process varies depending on the type of mirror and the wall material. For example, a frameless mirror may demand a different approach than a framed one. It’s vital to ensure that the hardware is compatible with your wall, whether it’s drywall, plaster, or masonry. By systematically following each step, from preparation to the final adjustments, you’ll successfully achieve a sturdy and level installation.
Key Takeaways
- Proper preparation ensures a safe and secure mirror installation.
- Accurate measuring and marking are crucial for a level and centered mirror.
- Following a step-by-step installation process leads to a professional-looking finish.
Preparation and Tools
Identify the Mirror Type
Frameless Mirror: For a sleek, modern look, you may opt for a frameless mirror. These mirrors require special clips or an adhesive for mounting since they lack a frame to anchor to the wall.
Framed Mirror: A mirror with a frame generally has built-in hangers or wire on the back, which can be hooked onto nails or screws secured into the wall.
Also read – A Guide to Different Types of Bathroom Mirrors
Gather Necessary Tools
To hang a mirror, you need the following tools and items:
| Tool/Item | Purpose |
| Measuring Tape | For precise measurements of the space and the mirror. |
| Level | To ensure the mirror is hung straight. |
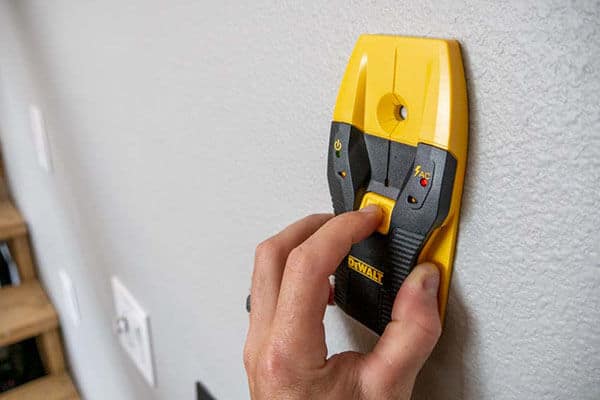
| Stud Finder | To locate studs for a secure anchor. |
| Screwdriver | To tighten screws or secure mounting hardware. |
| Wall Anchors (if needed) | For additional support in drywall where no stud is present. |
Be sure to select hardware that corresponds to the weight of your mirror, whether it’s a heavy framed piece or a lighter frameless design. A level is essential to maintain even alignment, avoiding a tilted appearance. A stud finder helps in locating the most secure part of the wall to hang the mirror, which is especially important for heavy items. Use a measuring tape to center the mirror over a vanity or desired space accurately. A screwdriver will be necessary to tighten any screws or to adjust the mounting hardware that comes with the frame. Wall anchors are an alternative when studs are unavailable in the desired location.
Measuring and Marking
Measure for Proper Placement
To achieve proper placement, you’ll need to determine the mirror location in relation to your vanity. Stand in front of the bathroom vanity and find the appropriate eye level. This becomes a reference point for the center of your mirror. Take a tape measure and find the width and height of the area above the vanity where the mirror will go. To help with symmetry, align the mirror’s center with the center of the sink. Be mindful of the mirror weight to choose the correct support fixtures.
- Width: Measure the area above the vanity to ensure the mirror fits. List the measurement.
- Height: Determine eye level and the desired height of the mirror. Note the measurement.
- Weight Assessment: Consider the weight of your mirror; heavier mirrors may require additional reinforcement.
Marking the Wall
Once you’ve measured for placement:
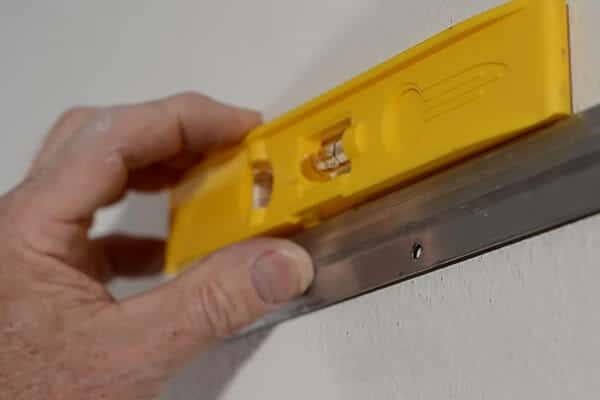
- Hold the level horizontally at your determined eye level.
- Make a light pencil line along the top of the level; this will indicate the bottom edge of the mirror.
- Verify the line is level before proceeding; this ensures your mirror will not be askew.
For vertical alignment:
- Use the level vertically to mark the sides if your mirror has a frame or mounting brackets.
- For heavy mirrors, locate the wall studs and mark them. Ensure the mountings align with these supports.
Remember to cross-check that all your marks are level and that they match the measurements you have taken. If you are off even slightly, your mirror could be noticeably crooked.
Installation Process
Mounting Hardware Setup
First, you’ll need to select appropriate mounting hardware. For heavy mirrors, consider using wall anchors or mounting brackets that are designed for the weight of your mirror. If you’re mounting the mirror on drywall, use drywall anchors to hold the weight securely.
- Locate the Studs: Use a stud finder to locate and mark studs in the wall. If no studs are available, position your wall anchors where the mirror will hang.
- Mark the Anchor Points: Hold the mounting brackets against the wall at the desired position and level. Mark the wall through each bracket’s mount hole with a pencil.
- Drill Pilot Holes: At your marked points, drill pilot holes for the anchors or screws.
- Install the Anchors: For drywall, tap the anchors into the pilot holes. If you’re securing directly into studs, the anchors are not necessary.
- Attach Mounting Hardware: Secure the brackets or other hardware to the wall using screws. Ensure everything is tight and level.
Securing the Mirror
With the hardware in place, it’s time to hang the mirror.
- Prepare the Mirror: If your mirror has hanging hardware attached, ensure it’s properly fastened and aligned.
- Lift the Mirror: Carefully lift the mirror and position it against the wall, aligning it with the mounting hardware.
- Secure the Mirror: Depending on the design, you may need to slide the mirror onto the brackets or use clips to hold it in place. Check that the mirror is firmly secured and adjust as necessary.
Remember, always follow the manufacturer’s instructions for both the mounting hardware and the mirror itself to ensure a secure and level installation.
Final Touches
After successfully hanging your bathroom mirror, ensure its stability, and carry out a clean-up and safety check to maintain a pristine and hazard-free bathroom environment.
Ensuring Stability
To confirm the stability of your newly installed bathroom mirror, gently test it by applying light pressure with your hands. Ensure that no movement is detected and that all mounting hardware is properly tightened. If your mirror is large or heavy, consider using bumpers on the lower corners to prevent it from shifting. These small additions can offer a layer of protection, especially in modern bathrooms where sleek designs can sometimes forego additional security for aesthetics.
Stability Checklist:
- All mounting hardware is secured
- Mirror does not move upon light pressure test
- Bumpers are in place for larger mirrors
Clean Up and Safety Check
Cleaning up after the installation is crucial. Sweep up any debris and vacuum if necessary to remove any small particles that could cause harm. Inspect the area around the mirror, specifically the vanity and light fixtures, for any tools or materials left behind. For your safety, double-check that there are no exposed wires or sharp edges where you work. A clean and safe bathroom ensures your renovation adds both beauty and functionality without any risks.
Safety Checklist:
- All tools and materials cleared from the area
- No exposed wires near the light fixture or mirror
- No sharp edges or loose hardware present
By following these steps, you can enjoy your bathroom mirror with the assurance that it’s secure and that your bathroom remains a clean and safe space.
